Table of Contents
sledge
motto: “if it smells it's chemistry, if it crawls it's biology, if it doesn't work it's physics”.
at the begin of february 2009 i had few days off which i've spent at my home city. wanting to do something unusual this time i've decided to create sledge of my own invent. you can but a lot of them in different stores for very low prices, but the fun is not the same… :)
sledge has been optimized for sledge running. :)
total cost of project was around 150PLN (~25EUR) + painting (i haven't done this yet ;)).
main ideas
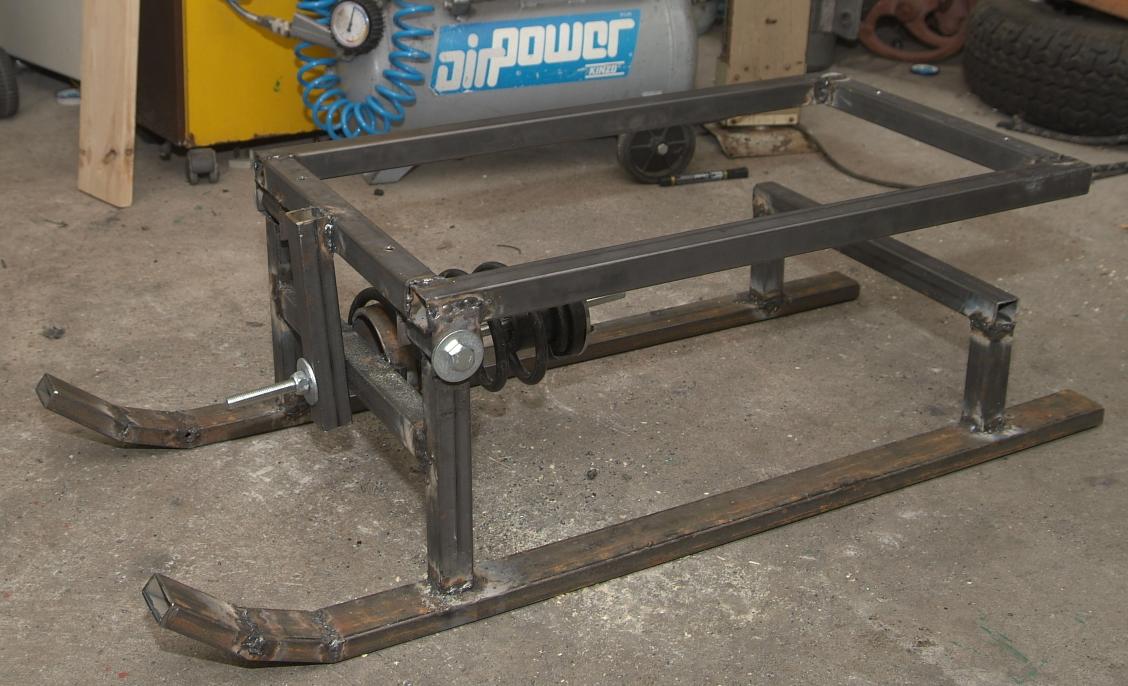 there are two ideas that i wanted to implement in the construction:
- slanting runner
- seat with a spring
first idea is to make sledge more stable when going through curves. when runners are made from closed profile of rectangular shape and are under some angle to the ground, when one runner goes up the second one gives extra friction which helps getting back to initial position.
second idea is obvious – when doing sledge running behind a car, riding with higher speeds (let's say: 40-60[km/h]) “meeting” hole in the ground can be painful… ;) having spring (part of absorber) can minimize this unpleasant effect plus can give you additional fun when riding on highly-hollow ground. :)
the mechanics
having in mind technical problems i've decided to resign from making slanting runner under some angle to the ground. mayby next time, when i'll have more time and patience… ;)
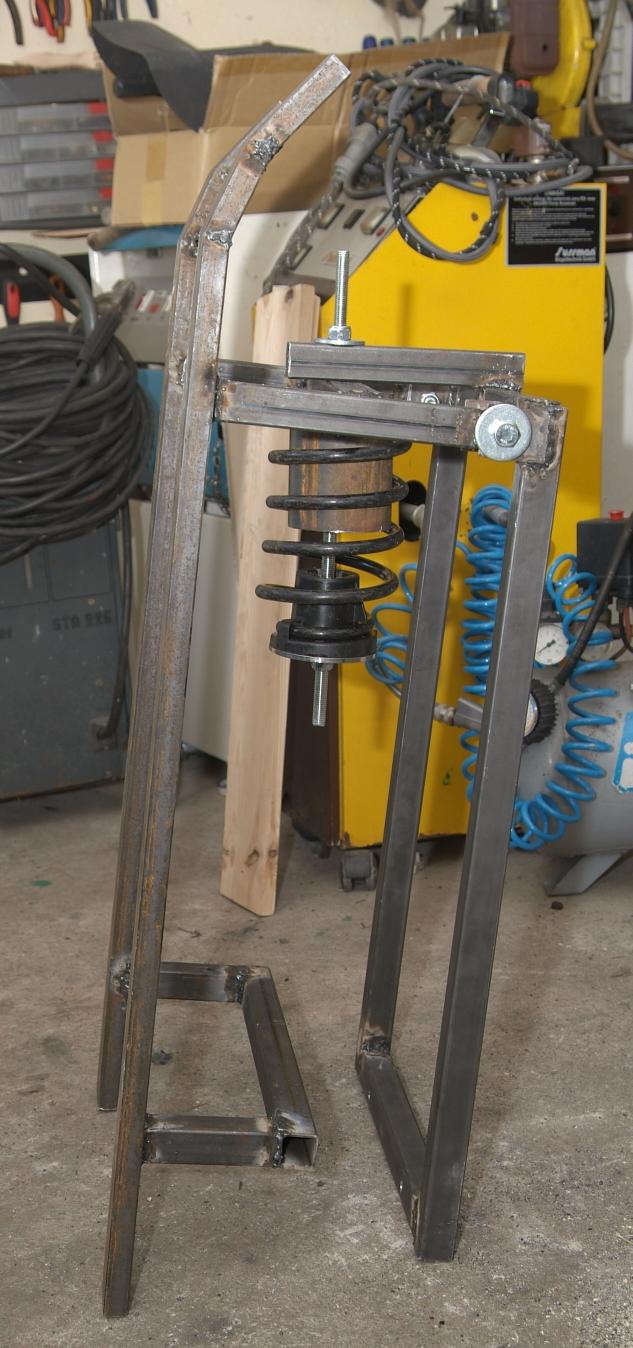
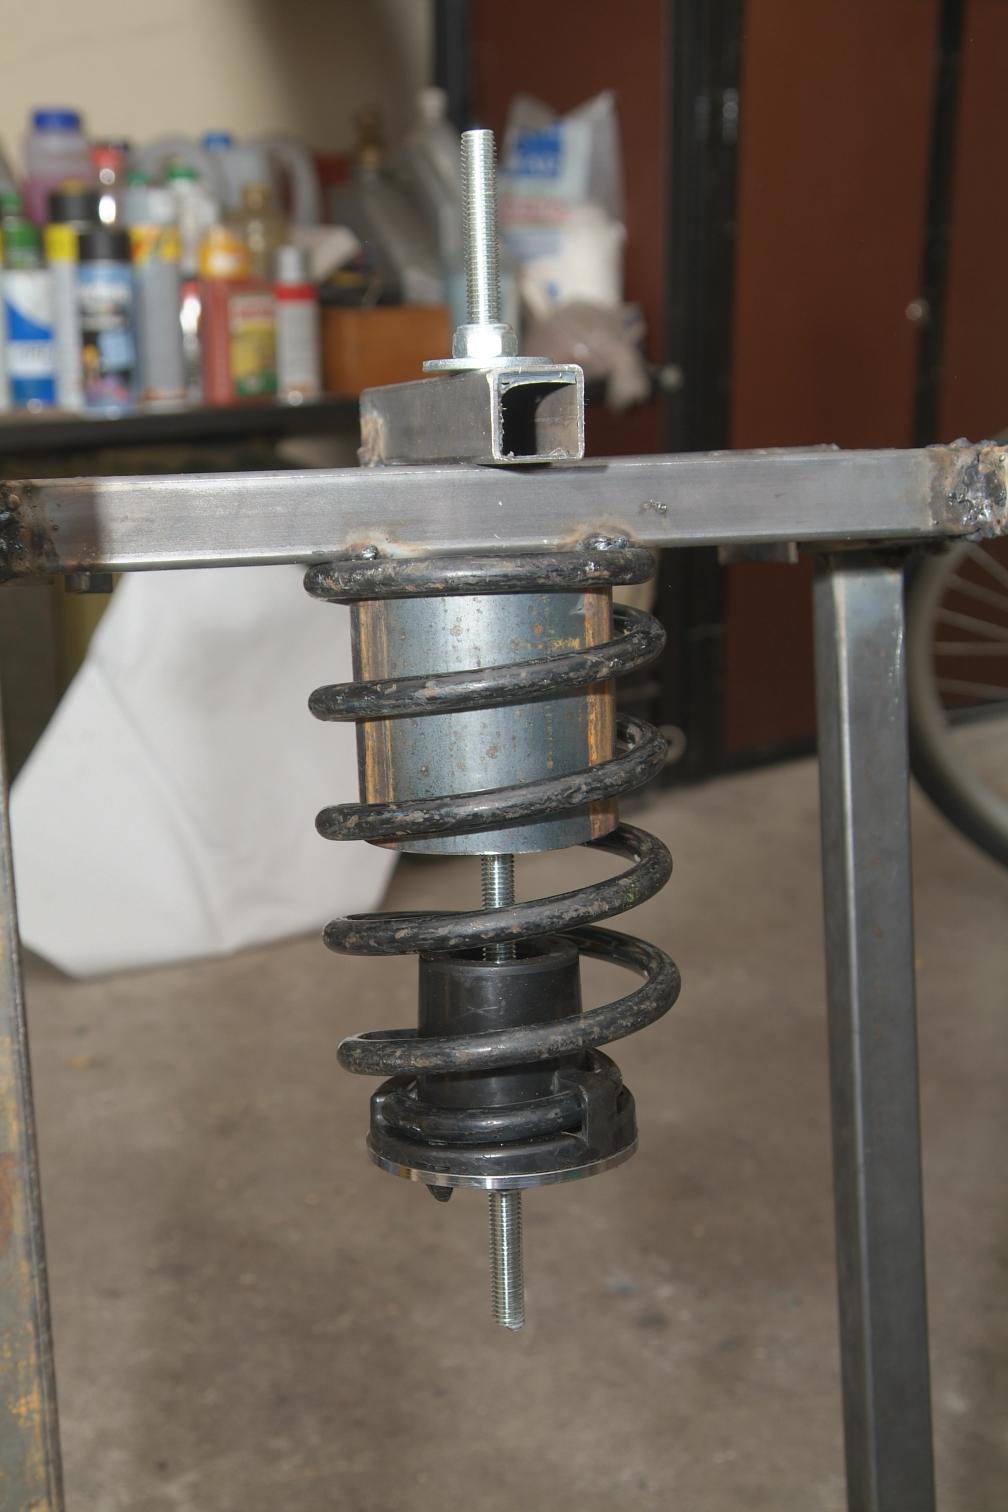
making amortization with a spring appeared to be a bit more tricky. after talk with Kuba we've decided to use horizontal configuration (horizontal spring) as shown on the picture:
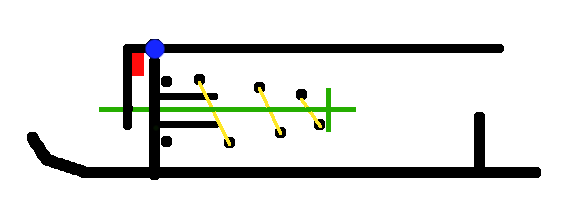
 where colors are:
- black – main construction (welded)
- green – spring mounting and a screw to connect both ends (long one :))
- yellow/black – spring itself
- blue – silentblock
- red – strut-like element that makes crucial structural part far more resistible
silentblocks are place at the both sides of sledge. this allows moving seat up and down under the pressure, which in turn squeezes spring.
parts
details you'll need are:
- spring – you can but these as a part of car suspension (absorber is not needed here – spring itself should give more fun :)) at the car dumping places (in polish: “szrot” :)).
- spring's mounting – it is best to ask lathe hand to do this for you in metal. shape depends on spring's mounting parts you already have bought with a spring.
- two silentblocks.
- wood for covering the seat.
in addition you'll need following metal parts (all are closed profiles):
| name | type [mm]x[mm] | length[cm] | count |
|---|---|---|---|
| runners | 20×50 | 100 | 2 |
| back column | 30×30 | 11 | 2 |
| back cross-bar | 30×30 | 40 | 1 |
| front column | 30×30 | 20 | 2 |
| front cross-bar | 30×30 | 34 | 1 |
| suspension's transmission | 30×30 | 20 | 1 |
| seat sides | 30×30 | 70 | 2 |
| seat ends | 30×30 | 34 | 2 |
i've also used 4 flats 4[mm] thick, 40[mm] wide and 5[cm] long to mount silentblocks. to make mounting of spring easier i used pipe 90[mm] in cross-section and 90[mm].
improvements made
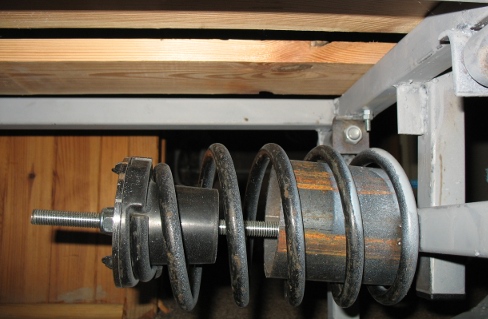
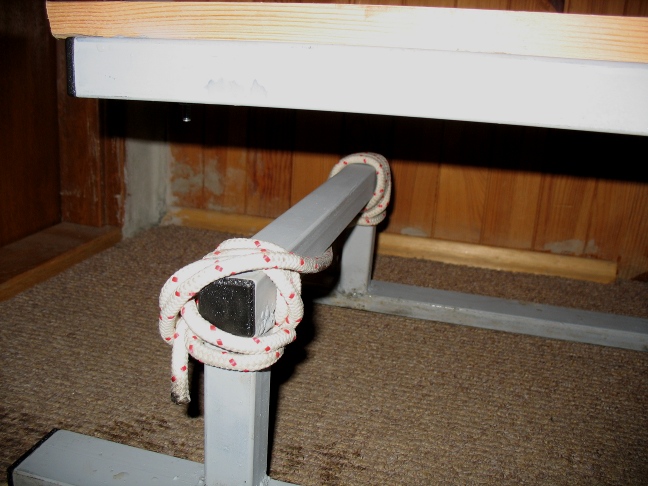 since project has been initially started (last year, i.e. 2009) i've added 2 small improvements:
- addition of strut in place where the strongest forces are present.
- added small fenders on the back of the construction, to avoid metal-metal hitting when running high-speed.
i used small piece of thick, metal plate as a strut. i've welded it to both elements, right in the corner, on the both sides. in place of small fenders (ex. like the ones used to block the door from opening too wide) i used tight rope that's doing just fine and does not need that much space and so the spring can move in a bit wider ranges.
both improvement can be seen on the images.
field trials and observations
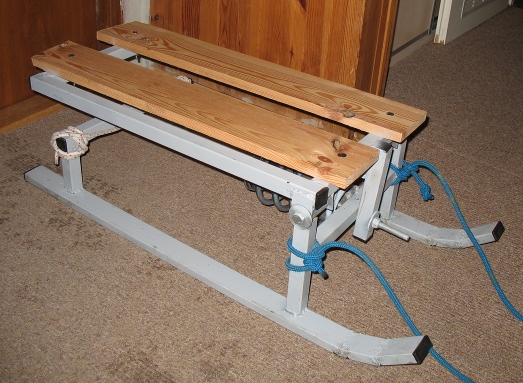 yesterday1) i've finished field trials – riding down the nearby hills. :) my first observation was that this sledge ride totally different from any one i had a chance to ride ever before! they ride very fast and through the vast range of snow. they ride well on ice/polished snow, just like any others, but they ride very well on fluffy snow as well. from my experience most of the sledges just “dived” into such a snow and stopped, while this one just runs it by! and so the speed is really good, nearly despite of the hill you're riding on.
when welding metal parts last year i got lazy and resigned form slanting runners in favour of regular, “flat” runners (0[deg] angle to the ground). this happened not to be the best idea, since flat runners are responsible for poor manoeuvrability, especially on low speeds. whey you ride faster, you can influence it a bit, but when speed is normal/slow sledge usually just run down the hill.
there is an interesting feature though – since turning direction is so hard, it is easy to rotate it a bit when riding down the hill and keep running in a slide with some angle to the running direction. in practice it is possible to slide in about ~30[deg] constantly. it gives and interesting impression when doing for the first time. :)
since sliding is easy, you can break easily too! when your road ends you can just slide at a higher angle and this will slower you a lot and change direction (when you're on flat area, already off the hill) so in about 2-3[m] you can make 90[deg] turn and stop sledge. on sledges i ride in the past this would be sure crash'n'roll situation.
sledge's construction is pretty heavy – i estimate it to be around 15[kg] in total! and here comes additional feature - since they're heavy and wide, whey're very stable when moving – it's not so easy to roll over on them. until now it happened to me just once, when i was sliding under about 45[deg] and hit small hole in the snow. it was kind of fun – boy, i was sure surprised… ;)
special thanks
last but not least i'd like to give special thanks to Kuba Szurgot for helping getting things done right: starting with the initial concept, helping with choosing proper materials and on searching for them finishing. additional thanks i'd like to direct also to Andrzej Szurgot for giving access to his workshop, where dispite of all you need, you can find more than you can imagine… ;)