Table of Contents
AVR Servo
AVR Servo is a multiple RC-servo mechanism controller device. the project aims at creating universal RC-servo controller. why another one? well… i recently needed one and non of those i found on the internet meet my requirements. except for controlling as many servo mechanisms as possible i needed to be able to change maximum and minimum positions of servo mechanisms at run time. additionally i needed to make default positions programmable. having this i can easily create devices, that have only limited movement, without worrying that erroneous high-level software will cause device damage.
all of the software for the uC is written in C++, while the device driver for linux uses new features of C++11 (formerly known as C++0x). thanks to this it combines fast execution times with high-level language features like abstractions.
device is a hard real time solution. it is also very noise resistant.
license
as usual, whole project is released under revised BSD license. feel free to do whatever you want with it.
note that though license does NOT obligate you to provide source code of any changes you make, community always appreciates input… and upgrades, if you'd do some. :)
electronics
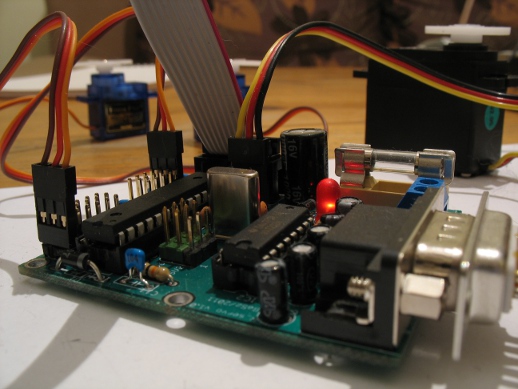
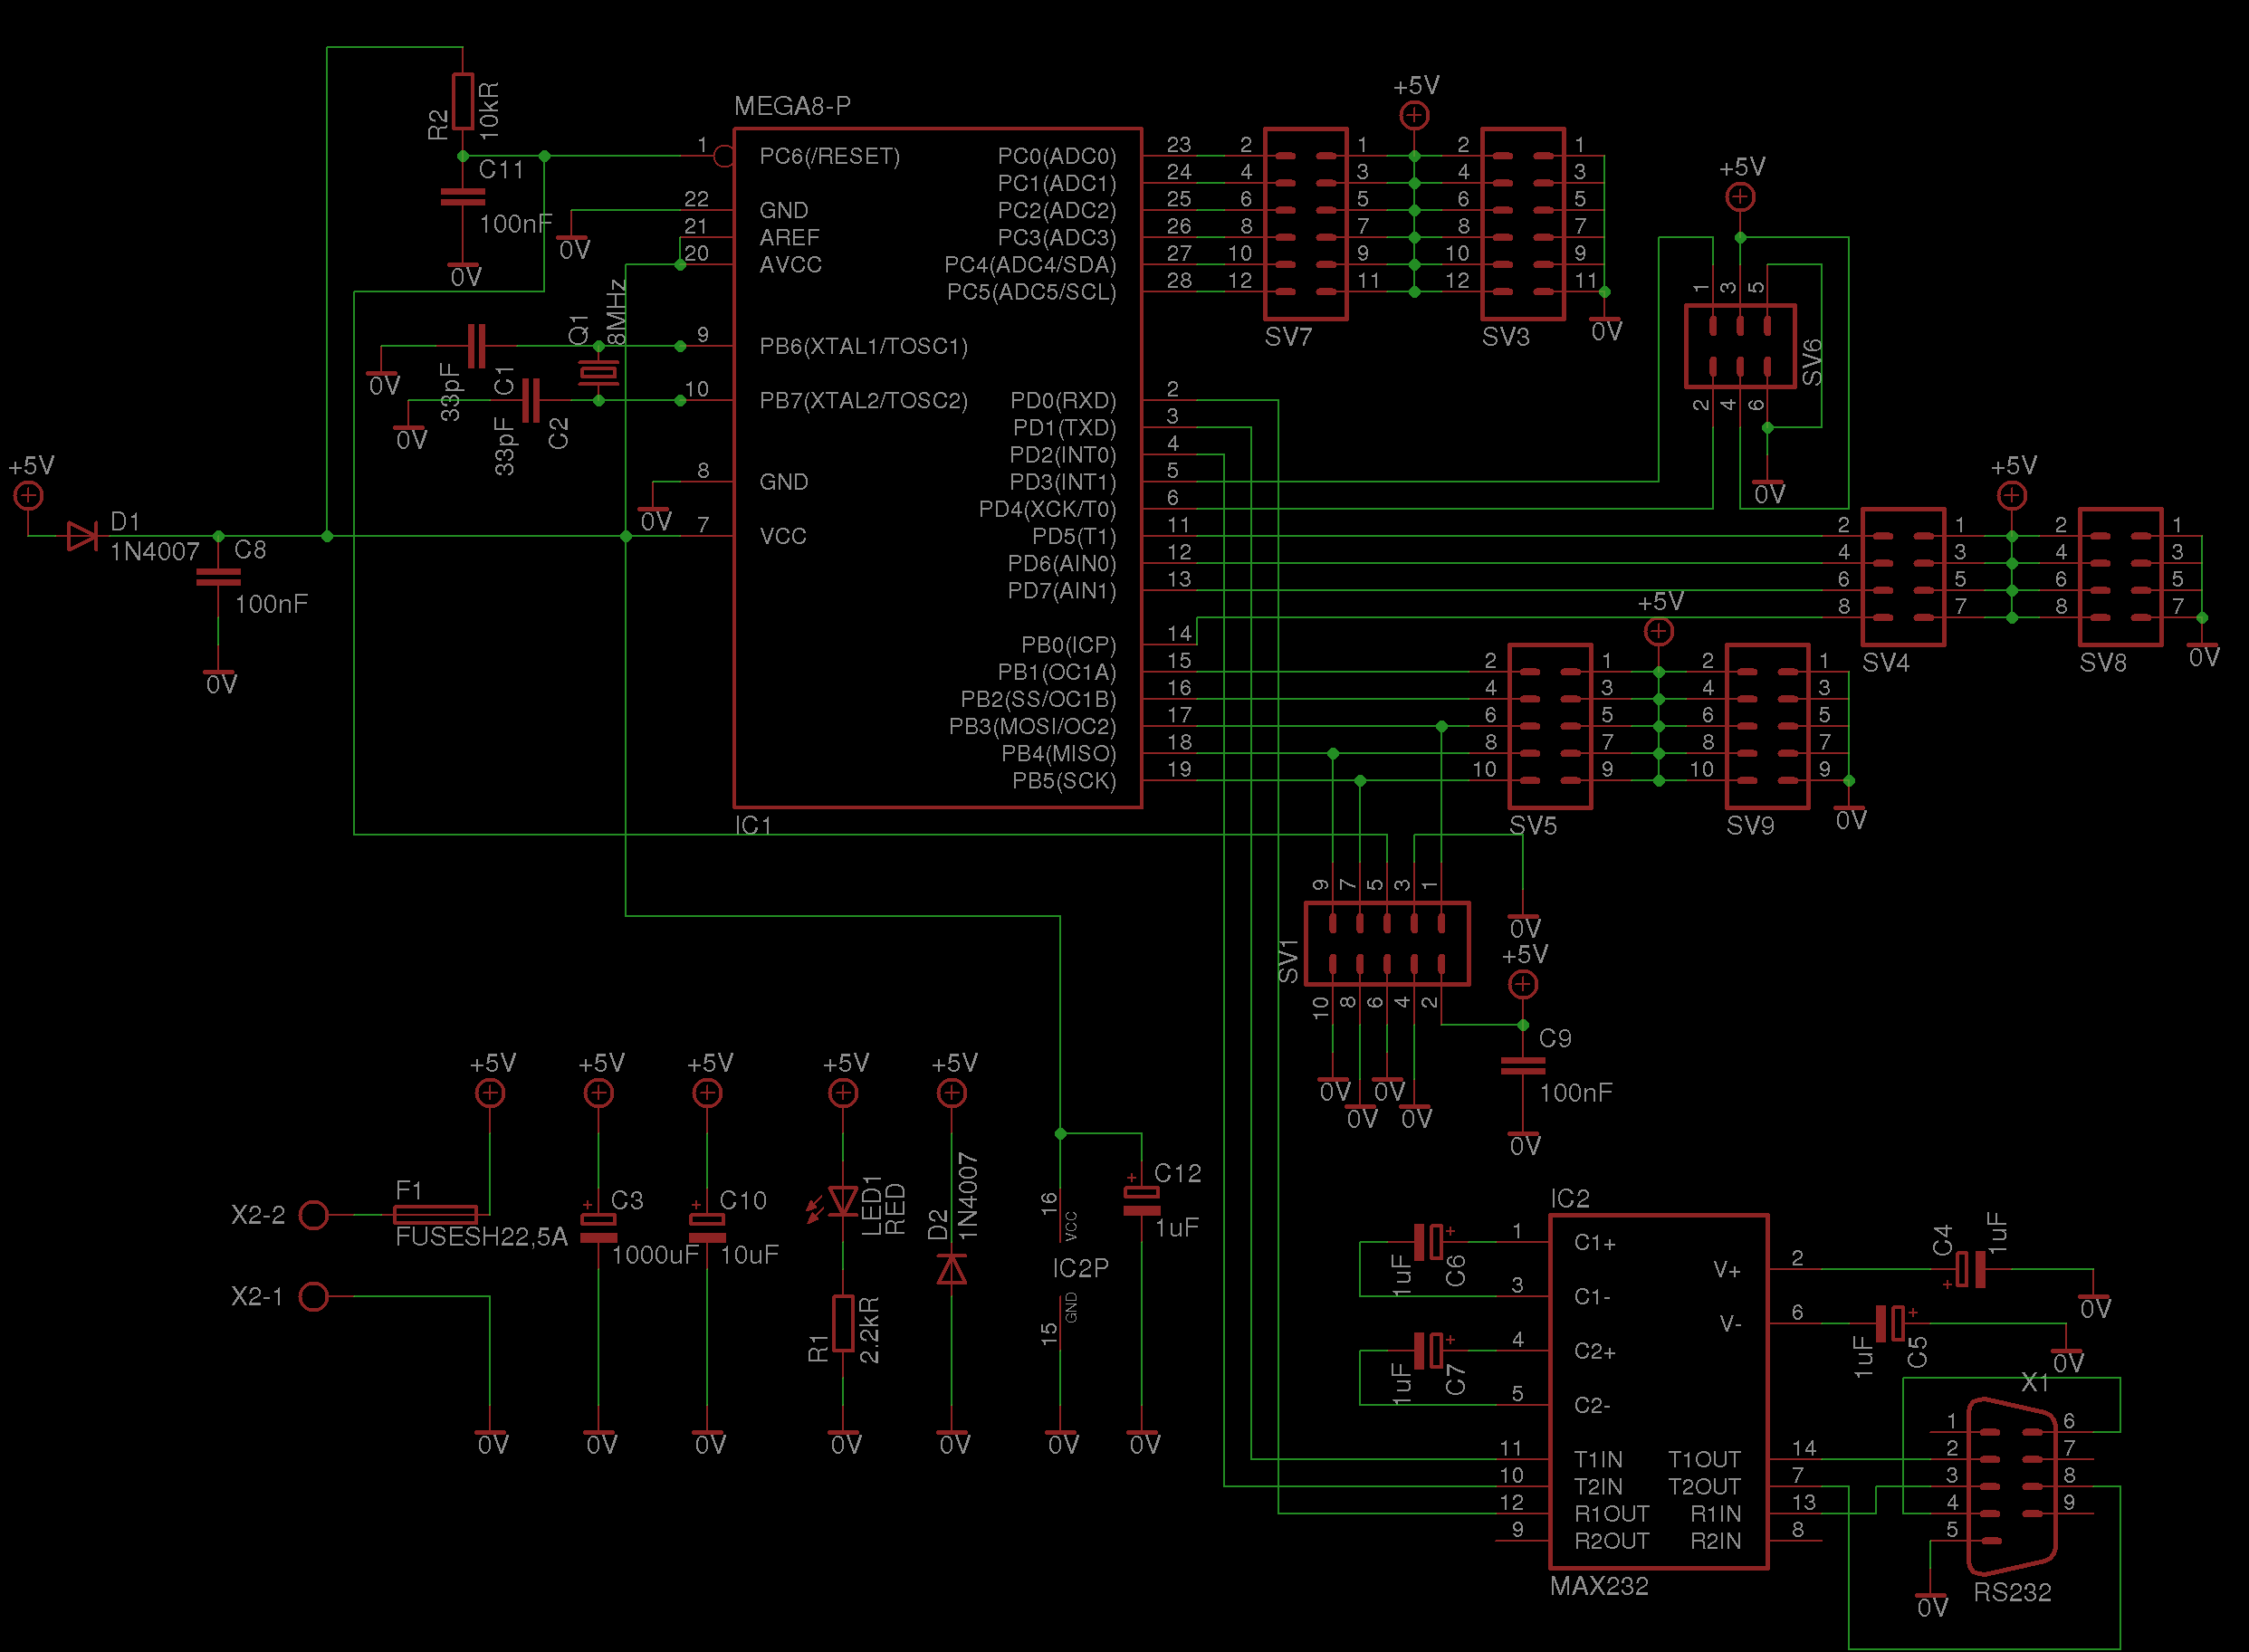
the board uses ATmega8 uC as the “core” and wp>MAX232 for RS-232 signal level conversion. uC works at 8MHz. whole board is designed to have a supply voltage of +5V.
as can be seen hardware handles up to 17 RC-servos1). there is also an over current protection provided (fuse).
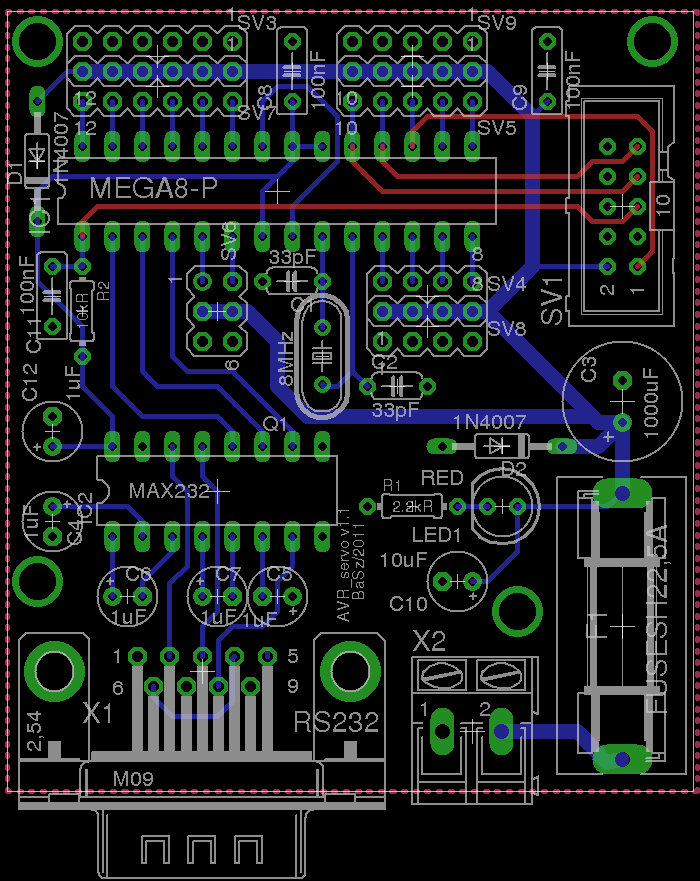
PCB has been created as a two-layer. it makes it more difficult to create at home (though no problem when ordering from PCB-making company), but it gives much “cleaner” routes and better shielding (two layers of “ground”). in order to better handle voltage fluctuations uC and MAX232 are supplied via diode and have own decoupling capacitors.
all of the device schematics is placed in project file, available in download section. it is placed under 'eka' directory.
software
software is placed in 'src' directory, in download packages. it consists of 3 packages:
- avr – this is the device code to flash uC with.
- tests – these are parts of code for uC, along with test code. this is compiled locally, on linux and can be used for testing parts of code, not directly related to any hardware-related elements.
- driver – this is the linux driver to communicate with the device.
linux driver
to build driver in release mode enter src/driver directory and type:
make PROFILE=release
to see what is doing one add the “V=1” option to make.
in order to tou around, use example application (see below). however to make something useful with the driver you'll probably want to create your own application. to do so use headers (gen/release_gcc_normal_default/includes/) and driver's library (gen/release_gcc_normal_default/libs/libservoctrl.a). the classes you are interested in are:
- CommDevice – device that will be used to communicate (this code is thread safe).
- ServoName – represents servo by the name ('a'..'q').
- Servo – class allowing to control selected servo, via provided communication device.
there is also SharedPtrNotNull class. it is std::shared_ptr<> equivalent, that does not allow nullptr to be put inside. thanks to this you no longer need to check if your pointer is valid.
code is trivial. you choose servo mechanism by its name ('a'..'q'), setup device by giving a path to the RS-232 device (in my case – /dev/ttyUSB02)). having this done you can create instance of the Servo class, that gives you direct control over given servo mechanism.
since version 2.0.0 responses from the device are handled via future/promise. this makes reading from port asynchronous. and so it is cheap to send commands and then wait for output on all of them. in case no response is required, it is just ok to ignore the return value(s).
though special means are taken to prevent data loss, some of the packages may arrive broken. it is expected to lost ~1% of commands begin sent to the device. data integrity makes sure that if data is being broken during sending/receiving it will be reported as an invalid and not executed.
example application
after system compiles you have a basic GUI application to toy around. its called simply PanTiltApp. when compiled in release mode it is compiled to file gen/release_gcc_normal_default/pantiltapp/pantiltapp.out. run it with 2 servos connected, that will do pan/tilt, and the camera. now you can move your camera with the mouse (just click on the empty window, that appeared and move mouse around).
protocol
huge advantage of proposed system is its protocol's clarity. it uses plain text to communicate, instead of binary ones. each position is encoded as one byte number.
each command consists of the following form:
(servo)(command)(posH)(posL)(xor)(endl)
where:
- servo – name of the servo ('a'..'q')
- command – what to do:
- 's' – set servo to a given position
- 'l' – set lowest position, that can be set
- 'h' – set highest position, that can be set
- 'd' – set default position to put servo in, when device is powered on
- posH – high half-byte of the position (as hex)
- posL – low half-byte of the position (as hex)
- xor – of all of the above bytes, XORed high with low half-bytes (as hex); to make sending commands manually easier, it can be replaced with '?' char, that means “do not check checksum”
- endl – any sequence of CRs and/or LFs (i.e. just hit enter on the terminal ;))
uC gives a short response to this: “(servo)-ok” (on success) or “(servo)-ERR” (on failure), where “(servo)” is the servo name send by the client.
as you can see, after flashing uC you can directly play with the device via serial link and a terminal (gtkterm is nice).
download
get latest version of AVR servo via github. you can also download recent releases using proper tag.
planned improvements
though device already works quite nice, there are still few things i plan to do, namely:
- add commands queue, so that commands can be sent in advance.
- add possibility to move servos with different speeds.


